Small WC ideas: 23 clever ways to plan a compact UK cloakroom
A downstairs WC is useful but rarely generous: an under-stairs cupboard, former porch or space beside the kitchen may need to fit a toilet, basin, door, pipework, storage and ventilation.
The best small WC ideas start with the plan, not the paint. Measure the room, choose fittings by projection, resolve the door swing and confirm waste and ventilation routes before choosing finishes.
This guide is for UK cloakrooms and downstairs toilets without a shower. The dimensions are useful planning allowances, not a substitute for the manufacturer’s drawings, an on-site survey or Building Regulations advice. If the room is also intended to be a shower room, use our small shower room ideas guide instead.
Contents
- Start with the layout, not the decoration
- Four compact WC layouts to sketch first
- 23 small WC ideas that solve a real problem
- Compare the main toilet and basin combinations
- Ventilation, moisture and installation details
- A sensible order for the work
- Indicative UK costs and a buying checklist
- Small WC ideas: frequently asked questions
- Final thoughts
Start with the layout, not the decoration
A WC that is about 800mm wide by 1,500mm long can be functionally possible, but it will be tight once the toilet, basin, skirtings and door are included. Around 1,000mm by 1,800mm is a more forgiving starting point for a conventional cloakroom. These figures describe a useful planning envelope, not a universal minimum: the shape of the room, the position of the soil pipe, the door and the fittings all matter.
Before looking at finishes, record these measurements:
- Finished width and length after plasterboard, tiles, panelling or boxing-in.
- Soil pipe, wastes, water supplies, electrics, windows, rooflights, radiators and skirtings.
- The door opening, hinges and full door-leaf arc.
- The projection of each chosen toilet and basin from its technical drawing.
For early sketches, allow roughly 480–550mm for a short-projection toilet, 600–650mm for many conventional close-coupled or back-to-wall toilets, and 200–350mm for a compact hand basin. Exact sizes vary considerably, particularly when a concealed cistern, wall-hung frame or boxing-in is involved.
Resolve the door before ordering fittings
An inward door may clash with the basin or knees. An outward or pocket door can release floor area, but check circulation, privacy, construction, fire and ventilation implications with the installer. Draw the full door arc before fixing a toilet position.
Keep a clear route to the services
Do not bury every pipe in an inaccessible box. Leave access to valves, cistern components, flush plate and wastes; if the soil pipe moves, check its fall and impact on the floor or ceiling below first.
Four compact WC layouts to sketch first
Use these as sketches, then overlay the actual product dimensions before buying.
1. Under-stairs cloakroom: toilet along the tall wall
Put the toilet at the highest part and the basin near the low entrance. A short-projection or back-to-wall toilet preserves knee room; a basin around 200–300mm projection is less likely to obstruct the door. Check head height where people sit and stand.
2. Narrow rectangular WC: fittings on one side
In a room around 900mm wide by 1,800mm long, put toilet and basin on one long wall to preserve a route from the door. A wall-hung basin keeps the opposite wall clear. Price any soil-pipe move before choosing this plan.
3. Window-side basin: toilet at the far end
Where privacy and sill height allow, put the basin beneath a window or rooflight. Position the mirror to catch daylight without reflecting the toilet from the hall; use obscure glazing or a blind where needed.
4. Awkward corner: compact corner fittings
A corner toilet or basin can reclaim an awkward angle around a boxed-in soil pipe, chimney breast or sloping under-stairs wall. Compare widest points and door clearance; corner fittings are not automatically smaller.
23 small WC ideas that solve a real problem
Make every millimetre earn its place
1. Choose a short-projection toilet. Measure from finished wall to pan front, not just cistern. A few centimetres can decide whether the door clears comfortably.
2. Consider a back-to-wall design. A planned panel hides the cistern and calms the room. Keep it serviceable and use the ledge only for light, moisture-tolerant items.
3. Use a wall-hung toilet where suitable. The clear floor looks lighter and is easier to clean, but the frame and finished wall still take depth. Compare complete installed depths.
4. Try a corner toilet or basin. Mark its widest point and the door arc first; use it to solve a geometric problem, not just to add novelty.
5. Swap to a hand-rinse basin. Around 350–450mm wide may be ample. Prioritise a shallow projection over a narrow bowl that blocks the route.
6. Use a toilet-with-basin unit. Check clean and waste connections, cistern access and basin orientation before ordering.
Add storage without stealing floor space
7. Recess a mirrored cabinet. It holds soap and spare rolls without projection. Confirm the wall is suitable and free of cables or pipes before cutting.
8. Fit a slim shelf above the cistern. Keep the flush plate, access panel and lid clear; one shelf is better than several projections.
9. Use the back of the door carefully. An over-door rail can hold paper and towels if it does not catch on the wall. Choose wipe-clean materials.
10. Build storage into boxing-in. If a service duct is needed, make part of it a shallow cupboard with a removable front and keep the access panel clear.
11. Put the towel near the basin. A small hook may be more useful than a rail behind the door; check the wet towel will not brush the wall or door leaf.
Use colour and pattern deliberately
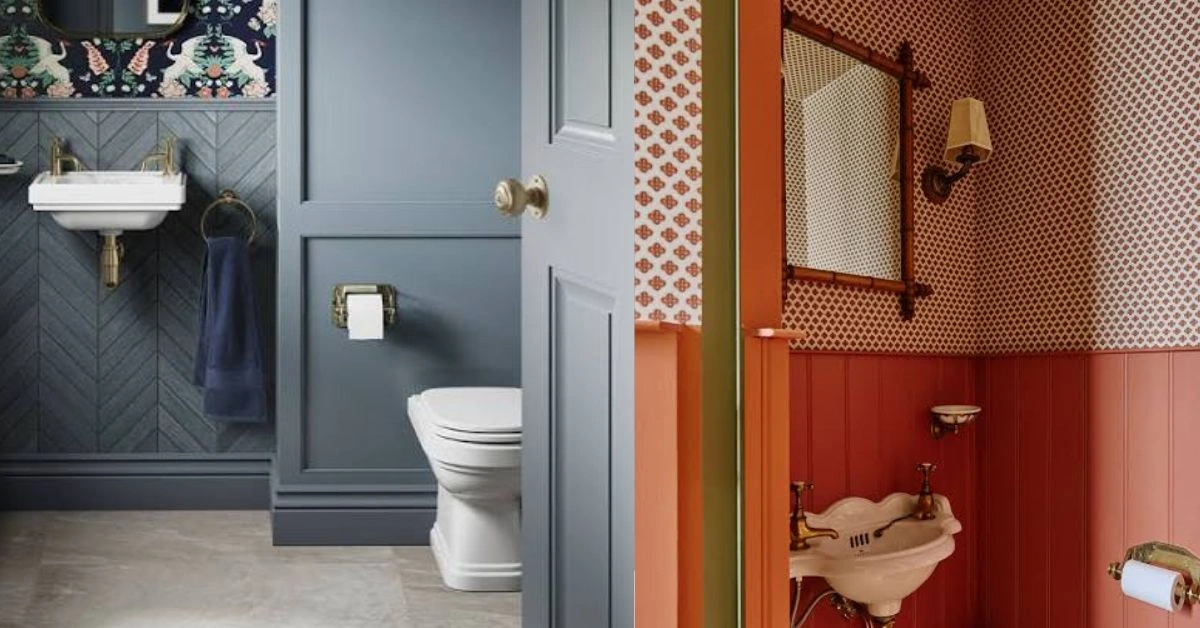
12. Paint ceiling and walls together. Colour drenching can blur boundaries. Sample the shade at different times; artificial light changes its warmth.
13. Tile the splash zone only. A basin wall or low splashback can protect the wet area while saving depth, grout and cost.
14. Use large-format tiles carefully. Fewer joints look calmer, but check the wall and service penetrations first to avoid awkward slivers.
15. Add wallpaper above a durable lower finish. Use a product and adhesive suited to the room, ventilate well and keep paper away from splashes. See Little Greene’s cloakroom advice.
16. Make the basin wall the feature. Use a patterned tile, saturated paint or framed mirror, and keep other finishes quiet.
17. Repeat one metal finish. Matching tap, flush plate, light and hook creates order; add one supporting material such as timber or ceramic.
Improve light, air and the everyday experience
18. Layer the lighting. Combine general light with even illumination at the mirror, using fittings suitable for the room. Separate switching can soften late-night visits.
19. Use the mirror to return daylight. Place it to catch a window or rooflight without reflecting the toilet from the hall; a mirrored cabinet adds storage.
20. Treat extraction as design. In a windowless room, plan a quiet fan, duct route, external termination and electrical supply before plastering.
21. Select moisture-tolerant finishes. Use washable paint, seal porous surfaces and choose hardware that tolerates regular hand-washing.
22. Put comfort ahead of novelty. A heated rail, warm-touch seat or sensor night-light may be more valuable than an oversized basin. Keep controls reachable.
23. Plan for varied users. Keep the route obvious, avoid sharp corners and seek professional advice if the WC must support someone with mobility needs.
For visual comparisons, PlumbWorld’s small cloakroom ideas shows the main compact fixture types. Check every chosen product’s technical sheet.
Compare the main toilet and basin combinations
| Combination | Typical planning allowance | Best for | Watch-outs |
|---|---|---|---|
| Short-projection back-to-wall WC + wall-mounted basin | WC about 480–550mm projection; basin about 200–300mm projection | Narrow, straight rooms | Concealed cistern and access panel need careful planning |
| Wall-hung WC + slim basin | Complete WC depth varies; often plan around 500–600mm until specified | A lighter look and easier floor cleaning | The frame, boxing-in and wall construction use real depth |
| Corner WC + corner basin | Use the manufacturer’s diagonal and widest-point measurements | Under-stairs or irregular corners | Door clearance can be worse than with straight fittings |
| WC-with-basin unit | Check the complete unit footprint, not just pan size | Concentrated plumbing and very compact plans | Basin orientation, maintenance access and user comfort vary |
There is no universally smallest solution. The right choice is the one that leaves a clear route, keeps the door usable and allows a plumber to service the fittings without dismantling the room.
Ventilation, moisture and installation details
A WC-only room still needs good air movement, especially without an opening window. Decide the extractor’s discharge, duct route and maintenance access before work; the installer should confirm the electrical arrangement.
Moisture affects the finishes too. Keep splash zones wipeable, seal cut tile edges and allow finishes to dry. The Bathroom Company’s cloakroom guide compares ventilation, moisture-resistant materials and layered lighting.
Before work begins, confirm:
- the soil-pipe route and required fall;
- whether the floor or ceiling below needs opening;
- the finished wall depth after boarding, tanking, tile or panelling;
- positions for the basin waste, tap tails, isolation valves and extractor supply;
- access to the concealed cistern and any service valves;
- the lighting, switch and fan positions; and
- which parts require a qualified electrician, plumber or building-control sign-off.
An inspiration image rarely shows the pipe route, wall build-up or service access, so do not use it as a plan.
A sensible order for the work
- Survey and measure. Record finished dimensions, door swing, ceiling slope, windows and service positions.
- Choose the layout. Decide where the toilet, basin, storage, light, fan and towel hook will go before selecting finishes.
- Check the products. Download the technical drawings and draw the actual footprints at full size.
- Confirm first fix. Resolve soil, wastes, water, electrical supplies, ducting and access panels.
- Build and make good. Complete any boxing-in, wall reinforcement, plasterboard or floor work before decorative finishes.
- Tile, paint and fit out. Protect finished surfaces while the sanitaryware, mirror, lights and accessories are installed.
- Test everything. Check flush performance, leaks, basin drainage, fan operation, light switching, door clearance and access to service parts.
This prevents the common mistake of choosing finishes first, then discovering that the door, waste or ventilation route no longer works.
Indicative UK costs and a buying checklist
For a UK project in 2026, treat the following as broad editorial planning allowances rather than live price evidence or a quotation. Location, access, VAT, labour, product quality, waste relocation and electrical work can change the total substantially:
- Decorative refresh with existing fittings: roughly £300–£1,000 if the room needs paint, accessories, a mirror and minor making-good only.
- Like-for-like cloakroom refit: roughly £1,500–£4,000 for new sanitaryware and finishes where the soil and water positions remain broadly usable.
- Reconfiguration or under-stairs conversion: roughly £4,000–£8,000+ once new drainage, ventilation, electrics, structural work, plastering and higher-spec finishes are involved.
Get written quotes separating products, labour, waste, making-good, electrical work and specialist fees; a low headline price may omit essential work.
Before ordering, list each item’s width, projection, finished height, service access, water connection, waste connection and lead time, including door furniture, mirror, lights, extractor, flush plate, seat, tap, trap, valves, hook and spare tiles.
Small WC ideas: frequently asked questions
What is the smallest practical size for a downstairs WC?
A planning envelope of about 800mm by 1,500mm can be workable for a very compact WC, but it will be tight and may not suit every fitting or door arrangement. Around 1,000mm by 1,800mm gives more flexibility. Treat these as design starting points, then verify the actual clearance, door swing, services and any applicable requirements for your property.
Is a wall-hung toilet always best in a small WC?
No. It can make the floor look clearer and simplify cleaning, but the frame and boxing-in need space and a suitable wall. A short-projection back-to-wall toilet may be shallower overall and easier to service. Compare complete installed depths, not the pan alone.
Should a small WC door open inwards or outwards?
An inward door can conflict with the basin and reduce the usable floor. An outward door or pocket door can release space, but must be assessed for circulation, privacy, construction and safety. Mark the full door arc on the floor and ask the installer to check the proposed arrangement before work starts.
Can I use wallpaper in a downstairs toilet?
Often, yes, but choose a product and adhesive suitable for the room, keep it away from direct splashing and provide effective ventilation. Washable paint, panelling or tile can be more forgiving where the room is damp or frequently used by children. Sample the wallpaper and colour under the actual lighting before ordering.
How can I make a small WC feel bigger without using white?
Keep the plan visually simple, choose one dominant colour, use a well-proportioned mirror and avoid unnecessary projections. Mid-tone or dark colour drenching can look sophisticated in a tiny room when the lighting is even. The sense of space comes more from clear sight lines and a controlled number of finishes than from white walls alone. For broader palette planning, see our bathroom decorating colour ideas.
Final thoughts
The most successful small WCs are not the ones with the most decoration. They are the rooms where the door clears the basin, the toilet projection suits the available length, the soil and ventilation routes were solved early, and every shelf or fitting has a reason to be there.
Start by drawing the room at its finished size. Test a short-projection, back-to-wall, wall-hung or corner arrangement with the real measurements. Then add one confident design move—perhaps a saturated colour, patterned wallpaper above a durable lower finish, a framed mirror or a carefully chosen light. With the practical decisions settled first, even a tiny UK cloakroom can feel generous, distinctive and easy to live with.