
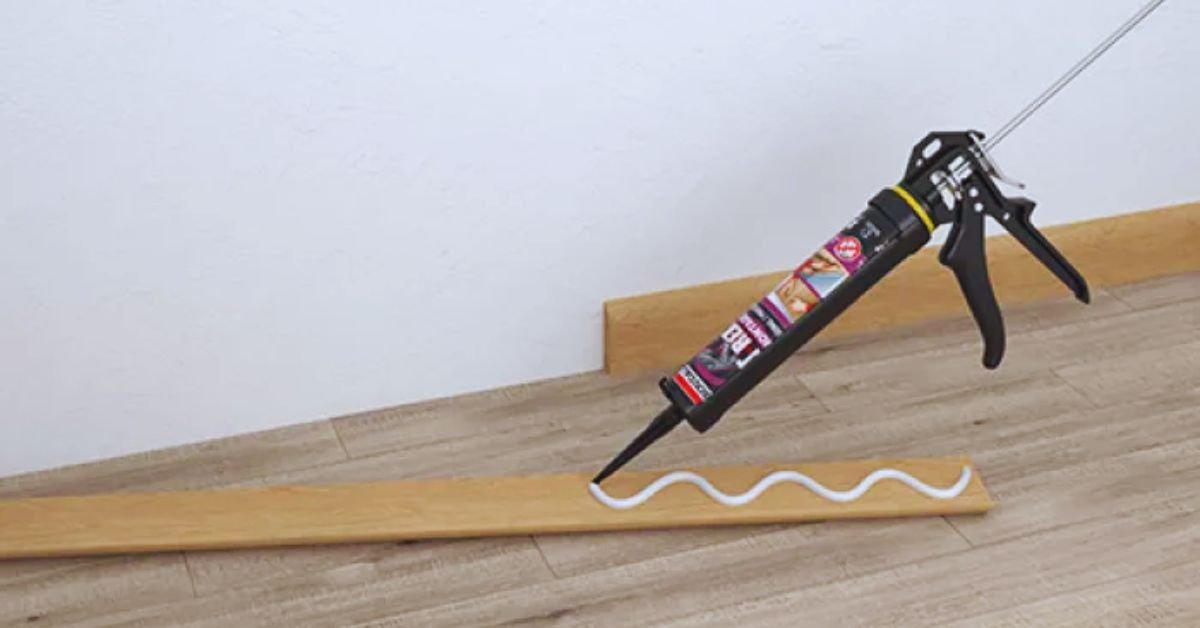
Skirting board glue is the quickest and cleanest way to fix skirting, and on a sound flat wall it is all you need. The failures people blame on adhesive are almost always down to the wall it was stuck to, the pattern it was applied in, or the fact that it was expected to pull a bowed board flat. Adhesive holds; it does not straighten.

Choosing the product is the easy part. Knowing when adhesive alone will not do the job is what separates a neat installation from one that pops off the wall in the first heating season.
Quick answer
Use a high-grab construction or “grab” adhesive designed for interior trim. Apply two continuous beads along the back of the board, one near the top and one near the bottom, rather than blobs. Press firmly for 10-30 seconds and allow up to 24 hours to reach full strength. On uneven walls, bowed boards or fresh plaster, add pins or screws to hold the board while the adhesive cures.
What “grab adhesive” actually means
Grab adhesives are thick construction adhesives that hold a component in position immediately, before they have cured, so you are not standing there supporting a board. That initial tack is the property you are paying for. Full strength comes later, typically over 24 hours, and the two should not be confused: a board that feels stuck after a minute can still be pushed out of line.
They come in three broad families, and the differences matter more than the branding on the tube.
| Type | Strengths | Limitations |
|---|---|---|
| Solvent-based grab adhesive | Very high initial grab; good gap filling on uneven walls | Strong odour; needs ventilation; can attack polystyrene and some plastics |
| Solvent-free / water-based grab adhesive | Low odour, overpaintable, often white; safer indoors | Slower to reach strength; needs a more absorbent substrate |
| Hybrid polymer (MS polymer) | Strong, flexible, tolerates movement and damp better; sticks to most substrates | Costs more per tube; some grades are slower to grab |
For most rooms, a solvent-free grab adhesive is the sensible default. It is pleasant to work with, paints over, and is plenty strong for trim. Choose a hybrid polymer where you need flexibility or the wall may see some damp, such as a utility room or a solid wall in an older property. Keep solvent-based products for situations where you need maximum immediate grab on a difficult surface, and ventilate the room properly while using them.
Whichever you buy, read the technical datasheet rather than the front of the tube. It states the substrates it is approved for, working time, cure time, temperature range and coverage per cartridge. Solvent-based products are hazardous substances in workplace terms, and the HSE’s guidance on controlling hazardous substances is a reasonable primer on ventilation and skin protection even for domestic use.
Match the adhesive to the wall
- Plasterboard (dot and dab or studwork). Adhesive works well. Bear in mind you are relying on the paper face of the board and, in dot-and-dab construction, on the dabs behind it. Pinning into studs where you can find them adds real security.
- Solid plaster on masonry. Excellent for adhesive, provided the plaster is sound. Tap along the wall first: a hollow note means the plaster has blown and needs attention before anything is stuck to it.
- Bare masonry or blockwork. Usable, but rough and often uneven. Expect to use a gap-filling adhesive plus mechanical fixings into plugs.
- Newly plastered walls. Wait. Fresh plaster holds a lot of moisture and will not give a reliable bond. Let it dry fully first.
- Painted walls, especially gloss. Adhesive sticks to the paint, and the paint sticks to the wall only as well as it ever did. Abrade the paint film along the skirting line to give a key.
- Damp or contaminated walls. Do not glue to them. Deal with the damp first; adhesive will not solve a moisture problem and will fail against it.
How to apply skirting board glue properly
Bead pattern is the single most common mistake. Isolated blobs create pressure points: the board sits proud where the blobs are and hollow in between, so the top edge rocks away from the wall and the caulk line cracks within months.
- Clean the surfaces. Both the wall and the back of the board must be dry, dust-free and grease-free. Vacuum rather than brush.
- Dry fit first. Offer each length up, check the mitres and the fit against the floor, and mark anything that needs adjusting. Adhesive is not the moment for discovery.
- Cut the nozzle at 45 degrees to give a bead roughly 6-8mm wide, and load the cartridge into a decent gun.
- Two continuous beads. Run one about 20mm down from the top edge and one about 20mm up from the bottom, along the full length. On tall skirting, add a third down the middle. Keep the beads well in from the ends so nothing squeezes out at the mitres.
- Press and hold. Position to your line, press firmly along the length and hold for 10-30 seconds. Some products want you to press on, pull off, wait a minute and re-fit for a stronger bond; the datasheet will say.
- Check level and line immediately, while adjustment is still possible.
- Wipe squeeze-out at once. Cured adhesive on a painted wall is a repair job. Water-based products come off with a damp cloth; solvent-based ones need the manufacturer’s recommended cleaner.
- Support while it cures. Pins, weights or props for the first hour or two, and up to 24 hours before treating the fixing as final.
A cartridge typically covers somewhere in the region of 5-8 metres of skirting with two beads, but coverage varies a lot by product and bead size, so check the tube and buy one more than you think you need.
When adhesive alone is not enough
Adhesive holds a board where you put it. It cannot pull a board towards the wall. That distinction explains almost every adhesive-only failure.
- Bowed or twisted boards. A length under tension will spring off. Use screws or pins to pull it in, or pick a straighter board.
- Uneven walls. Where the gap varies by more than a few millimetres, use a gap-filling adhesive and mechanical fixings, or make good the wall first.
- Tall or heavy skirting. A 170mm MDF board is a lot of weight and leverage. Add fixings.
- External corners. The most vulnerable point in any run. Pin the mitre and glue the mitre faces with a little wood glue as well.
- High-traffic areas. Hallways and stair strings take knocks and vacuum impacts; mechanical fixings are cheap insurance.
- Anywhere it may need removing. Screwed skirting comes off with minimal damage. Glued skirting usually takes plaster with it, as our guide to removing skirting boards without wall damage explains.
Before driving any fixing into a wall, check what is behind it. Cables and pipes run in predictable zones but not reliably so, particularly in extended or rewired properties. Use a detector, and follow Electrical Safety First’s home safety guidance if you are unsure. Cables often run down to sockets exactly where skirting sits.
Curing, temperature and finishing
Most grab adhesives want a room above about 5°C and will cure slowly in a cold, unheated space. Working in an unheated winter room is a common reason boards seem never to grip properly. Equally, do not turn underfloor heating on hard immediately after fitting; let the adhesive cure at a stable temperature first.
Wait for a full cure before you caulk and paint. Caulking too early traps solvent or water, and the caulk line can crack as the adhesive shrinks. Once cured, caulk the top edge to the wall, fill pin holes and mitre gaps, sand lightly and paint. If you are fitting MDF, prime the cut ends before fixing rather than after; our guides to MDF primer and painting MDF cover the order of work.
Common mistakes
- Blobs instead of beads. The root cause of rocking boards and cracked caulk lines.
- Gluing to fresh plaster or damp walls. The bond fails and takes the plaster face with it.
- Expecting adhesive to straighten a bowed board. It will not.
- Leaving squeeze-out to cure. Wipe immediately.
- Treating the initial grab as full strength. Give it 24 hours before loading or knocking it.
- Solvent adhesive against polystyrene insulation. Check compatibility; some solvents dissolve it.
- Working in the cold. Below about 5°C most products will not cure as intended.
- Gluing where you may want to remove later. Around a run you will disturb for new flooring, screws are the friendlier choice.
Frequently Asked Questions
1. What is the best glue for skirting boards?
A high-grab construction adhesive made for interior trim. Solvent-free grab adhesive suits most rooms because it is low odour and overpaintable; a hybrid polymer is better where flexibility or a little damp is a factor; solvent-based products give the strongest immediate grab but need good ventilation.
2. Can you fit skirting boards with glue only?
Yes, if the wall is dry, sound and flat and the boards are straight. Add pins or screws where walls are uneven, boards are bowed or tall, at external corners, and in hallways and other high-traffic areas.
3. How long does skirting board adhesive take to dry?
Initial grab is immediate, but full strength usually takes around 24 hours. Cold rooms slow this considerably. Wait for a full cure before caulking, painting or knocking the boards.
4. How much adhesive do I need per metre of skirting?
One standard cartridge typically covers around 5-8 metres with two continuous beads, though this varies by product and bead size. Check the coverage figure on the tube and buy a spare, since running out mid-wall means a visible cold joint.
5. Can you glue skirting board to plasterboard?
Yes, and it is common practice. You are relying on the paper face of the board, so keep the wall clean, use continuous beads, and where possible pin into studs as well. On dot-and-dab walls the adhesive is only as good as the dabs behind the plasterboard.
Final thoughts
Pick a grab adhesive suited to your wall, apply it as two continuous beads rather than blobs, and be honest about whether the wall is flat and the board is straight. Where either answer is no, add mechanical fixings; that is not a failure of the adhesive but the correct method for the conditions.
For the setting-out and cutting side of the job, our step-by-step guide to fitting skirting boards covers coping internal corners and dealing with out-of-square walls, and pine skirting board looks at preparing timber trim before fixing.